
TravelingForMiles.com may receive commission from card issuers. Some or all of the card offers that appear on TravelingForMiles.com are from advertisers and may impact how and where card products appear on the site. TravelingForMiles.com does not include all card companies or all available card offers.
If you’re not new to the miles or points world or the Qatar Airways Privilege Club, this will probably be too basic for you. If, however, you haven’t yet set up your Qatar Airways Privilege Club “My List” or don’t even know what it is yet, this article may be helpful.
As of June 2026, Qatar Airways has made it considerably harder for members of its Privilege Club frequent flyer program to redeem Avios for others, and now there are just two ways by which this can be done. One such way is by creating a “My List”.
What is “My List”?
We won’t go into great depth here as we’ve already cover this in the article linked above, but in brief:
My List is a list of four Privilege Club members on whom the list owner (the person who created the list) can spend their Avios through the Qatar Airways Privilege Club.
List members must:
- Be invited to join the list by the list creator
- Be 18 years of age or older
- Hold their own Privilege Club account
- Not be on anyone else’s “My List”
To be permitted to create a “My List”, a Privilege Club member must have had an active Privilege Club account for at least 30 days and must have, at some point in the past,
credited a flight to the Qatar Airways Privilege Club (this can be a Qatar Airways flight or a partner flight) or credited a transaction from an eligible Qatar Airways co-branded credit card to their Privilege Club account.
There are a number of other rules and restrictions surrounding My List, but those are covered in our other article and aren’t relevant here.
Create a Qatar Airways “My List”
This is super-simple, but here’s a walkthrough anyway.
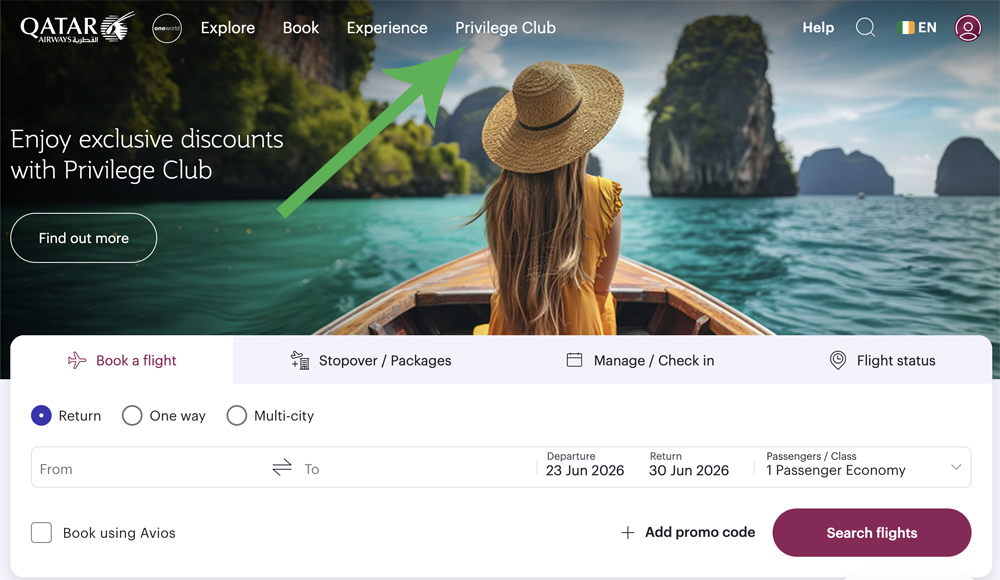
Step 1 – Head over to the Qatar Airways homepage and login to your Privilege Club account.
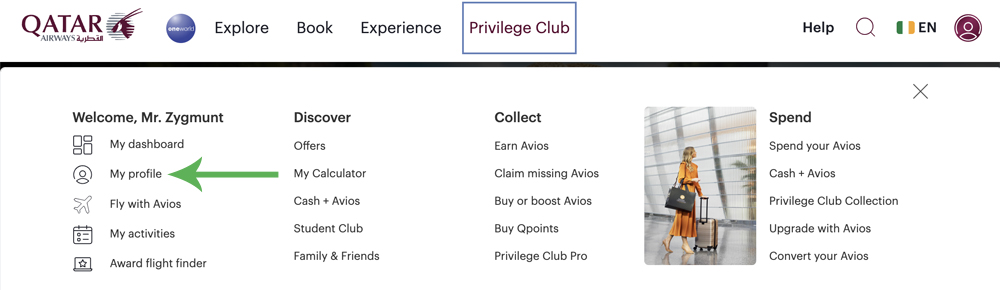
Step 2 – From the homepage, click on “Privilege Club” from the menu at the top of the screen …
… and then click on “My profile” in the dropdown menu that appears.
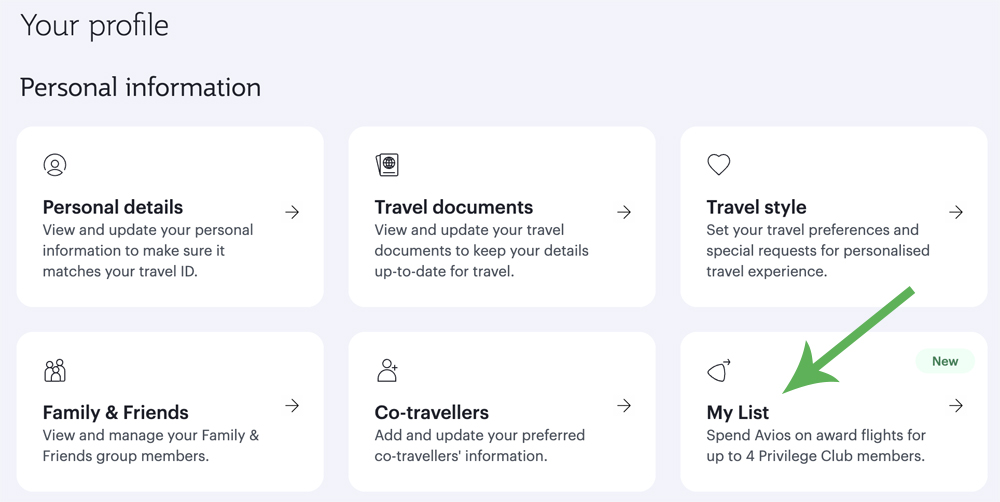
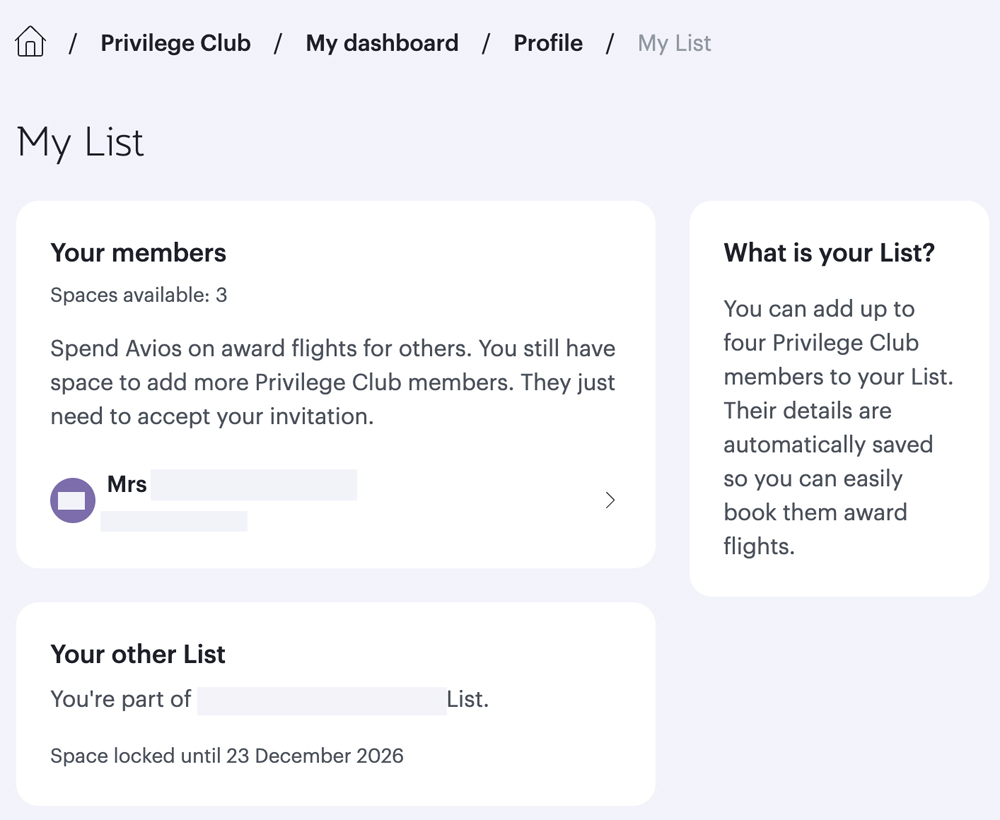
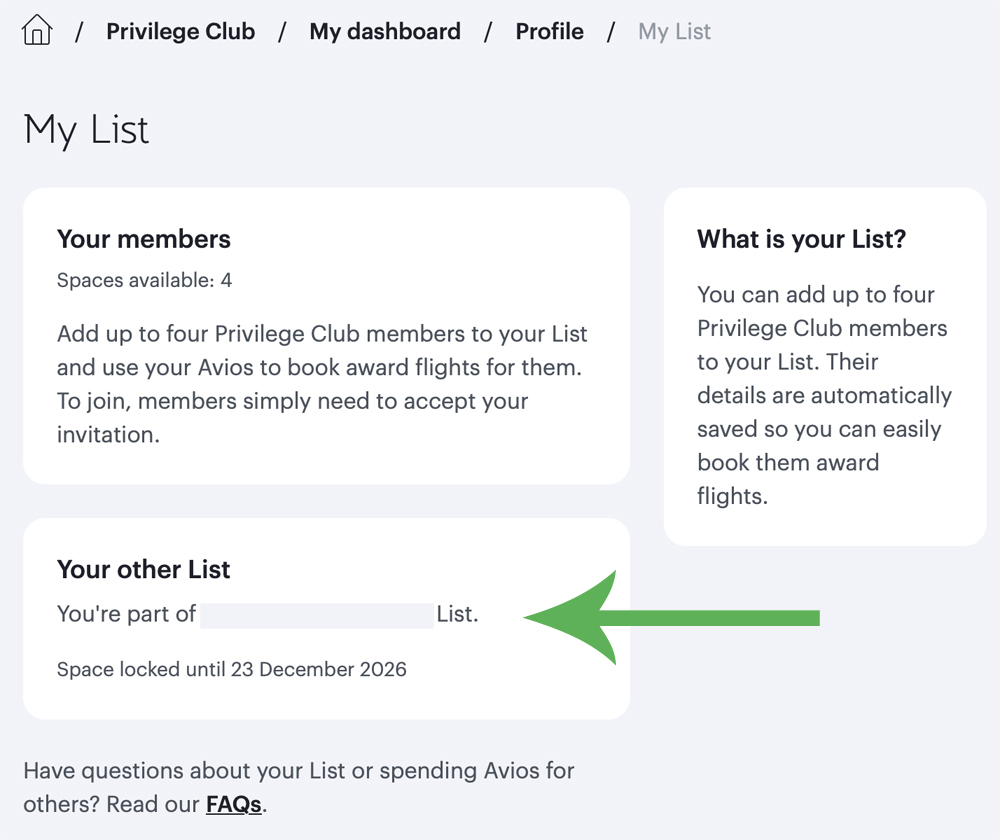
Step 3 – Your profile page will now be open and on there you should see the “My List” link. Click on this (obviously!)
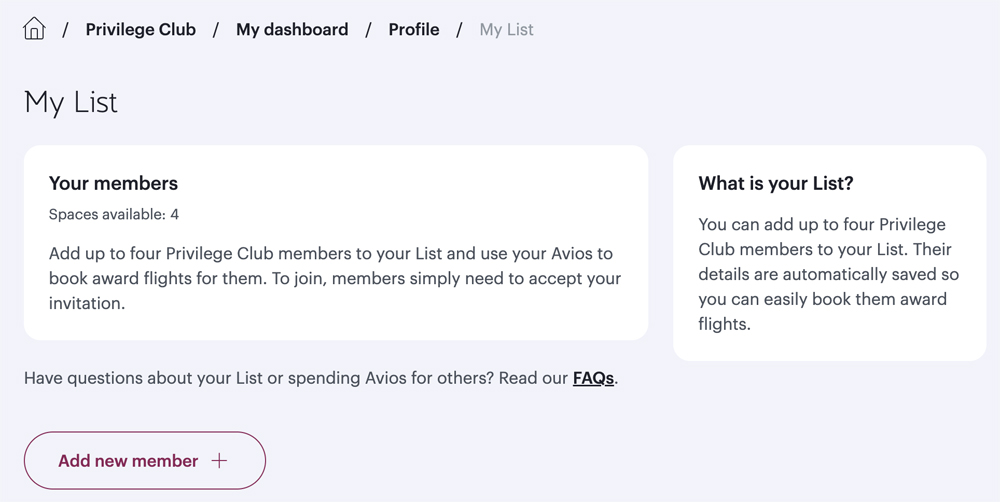
Step 4 – The page that’s now open will, in time, show you all the people who are on your My List and the person in charge of the My List that you belong to (if you belong to someone else’s My List).
For now, just click the “Add new member” button.
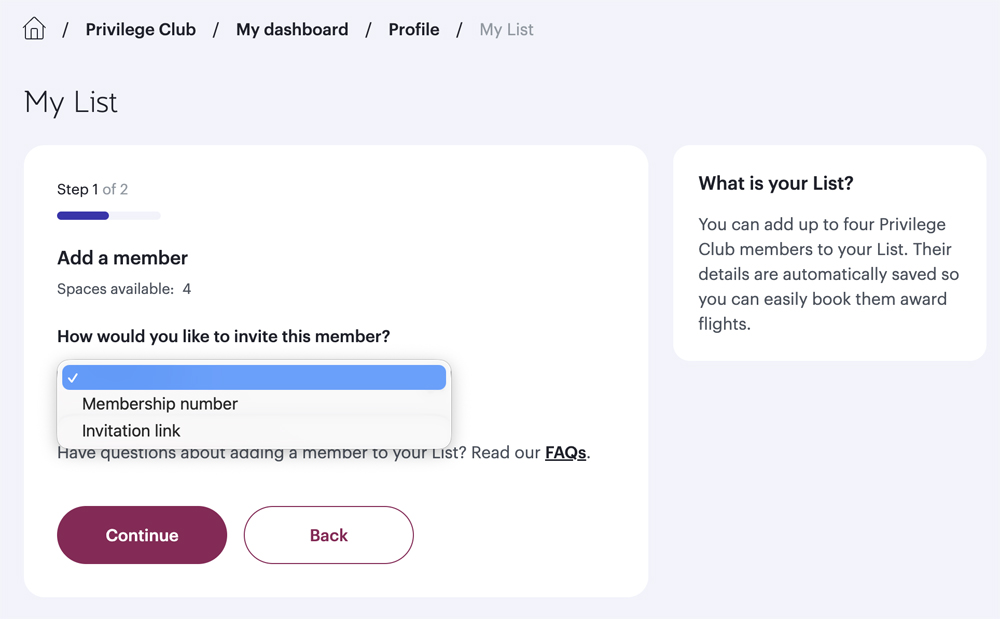
Step 5 – At this point you can choose how you wish to invite a member to your My List. You can start with their Privilege Club Membership number or with an invitation link. If you’re going to use a link, you’ll need to know the recipient’s email address.
Select which option you find to be the simplest and click the “Continue” button.
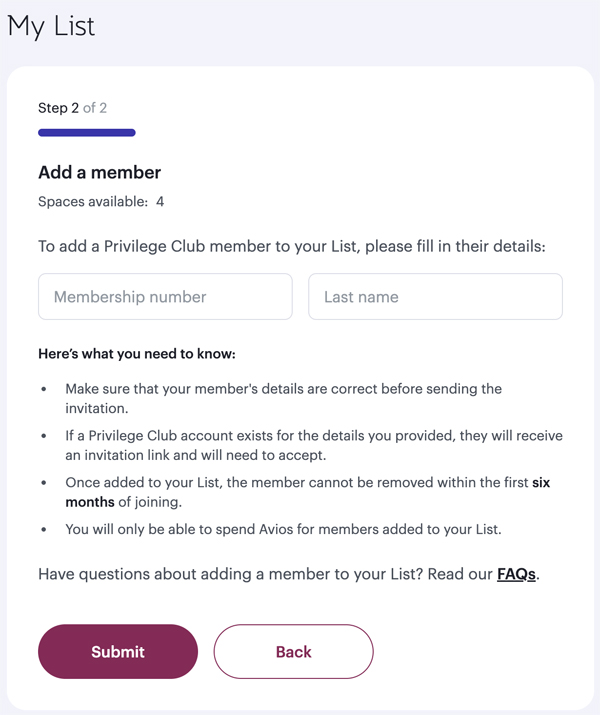
Step 6 – If you chose to invite someone using their membership number, you’ll now be invited to enter that number and the member’s surname. Enter both and click on the “Submit” button.
If you chose to invite someone to your My List via a link, a link will be created for you and, if you then click the “Email your invite” button, your email app will open and a pre-written email will be ready for you to send.
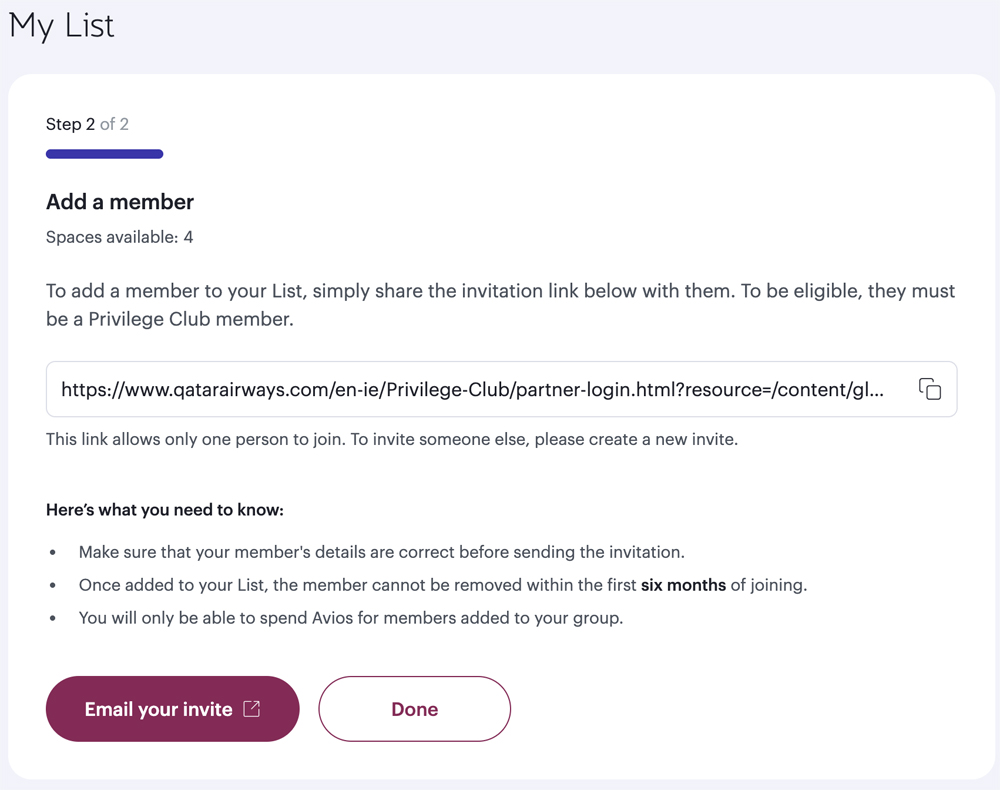
The text of the email isn’t the best, so you may wish to edit it before sending.
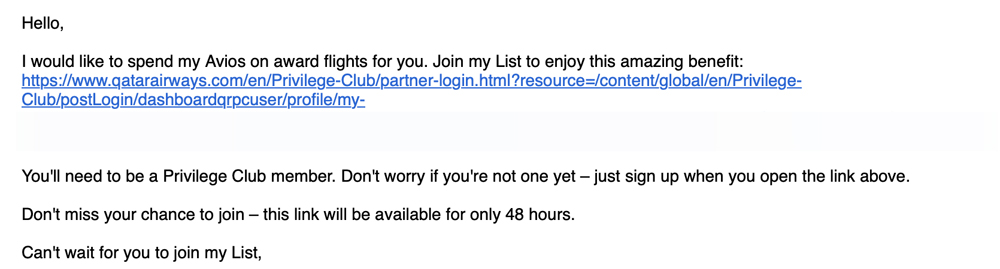
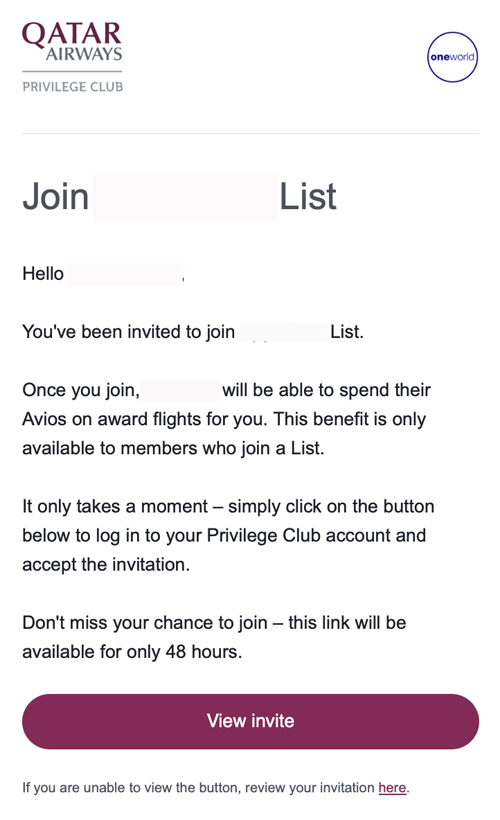
If you send an invitation using a person’s Privilege Club number, this is the body of the email they’ll receive (correct at the time of writing):
Step 7 – Assuming your invitation is accepted, you’ll get an email confirming this. At the time of writing, the body of that email looks like this:
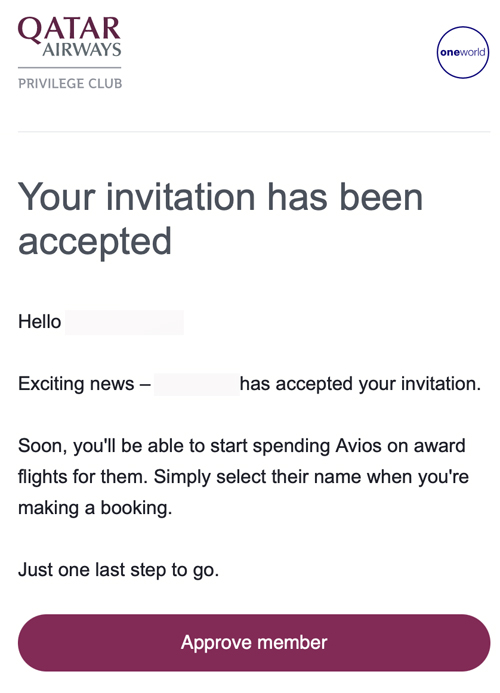
As long as you haven’t changed your mind, click the “Approve member” button in the email.
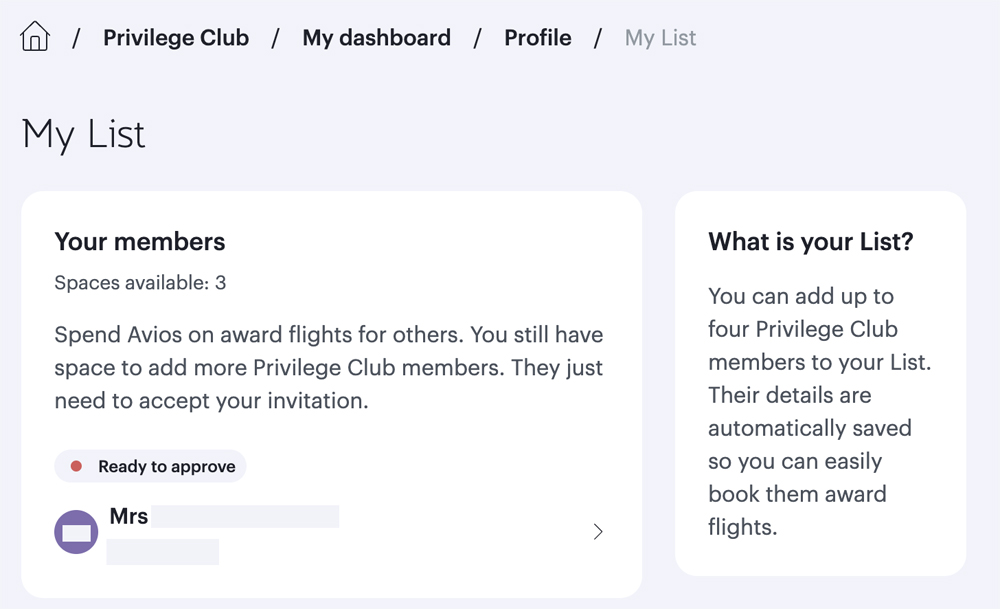
Step 7 – By clicking “approve member” in the acceptance email the link takes you back to your Qatar Airways My List where you should see the invitee’s name with “ready to approve” above it.
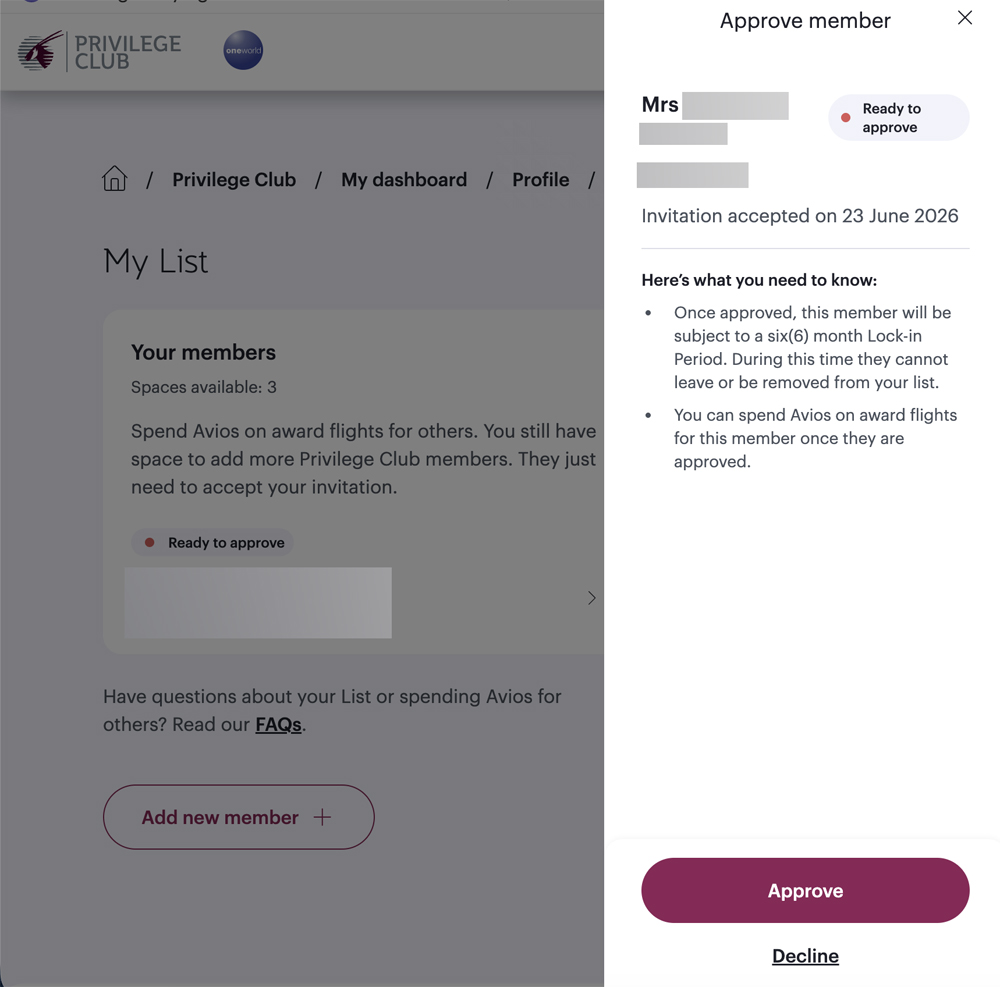
Click on the name (or the arrow next to the name) to beinn the simple approval process.
Step 8 – A sidebar should now open on the page, and you will be asked to confirm that you want to approve the addition of this person to your list. Click on the “Approve” button at the bottom of the sidebar.
That’s it. All done.
Once you’ve approved a person’s addition, they’ll appear in your My List just above the section showing who’s list you belong to (if you belong to someone else’s list) and you should be able to see how many more spaces you have open on your My List.
The invitee doesn’t get any further updates after they accept an invitation, but once their addition to your My List has been confirmed (by you), they will be able to see their inclusion on your list within the My List section of their Privilege Club account.
Bottom line
As we said towards the very beginning, this is basic and super-simple, but if may be of help nonetheless.
The key thing is to make sure that if you frequently book trips for others through the Qatar Airways Privilege Club (this includes others who may be travelling with you on the same flight and on the same booking), you should create a My List as soon as possible to ensure that when the time comes to make a booking, you’re not held up by the bureaucracy of creating your My List before you can proceed with the booking.


")
")

")
")


")

")
